So, I made Genzano bread. It comes from a small town about a 35-minute drive from Rome. Special characteristics: very wet dough, a blackened exterior and enormous size.
I used Daniel Leader’s recipe and kneaded by hand, despite the “courage, strength, and patience” he warned it would take to knead something so wet. Boy, am I sick of kneading by hand. Still, courage, strength and patience? No. That is what it takes to, say, scale K2.
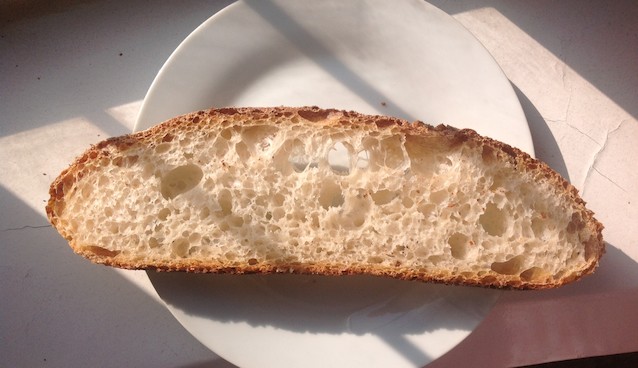 You can see the wetness of the dough in the open texture of the crumb.
What I want to talk about more, though, is this recipe for Mexican conchas by Virtuous Bread. Virtuous Bread is a great site, and I am pining after this book by its author, Jane Mason.
Conchas are sweet breads that taste like brioche topped with a layer of crunchy sweet topping. The toppings usually come in chocolate, strawberry or cinnamon.
‘Concha’ literally means seashell. As What’s Cooking Mexico tells me, lots of Mexican pastries have similarly fantastical names: “We have besos (kisses), calzones (underpants), cuernos (croissants, literally horns), trenzas (braids), corbatas (ties), pellizcadas (pinched bread).”
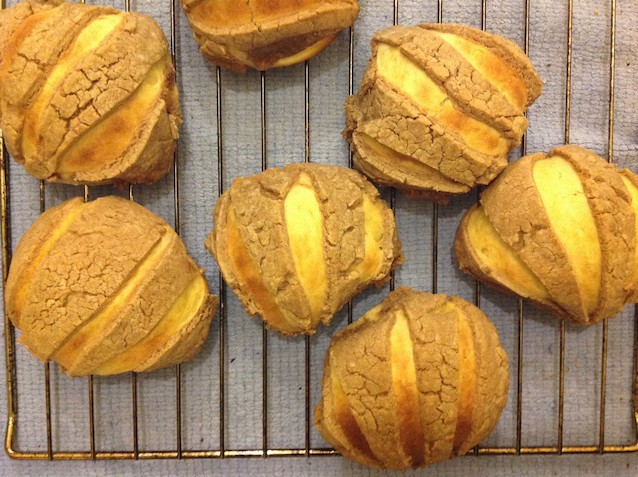 These are laborious, but delicious enough to be worth it.
I liked Virtuous Bread’s recipe, but I thought it made things overly hard work at the kneading stage (10 mins plus 30 mins? no thanks). I also couldn’t make the topping come together with the amount of water recommended. So a tweaked version is below and you can find the original with some useful photos here.
Ingredients:
for the dough
500g plain white flour
125g sugar
10g salt
120g butter (melted and cooled but still liquid)
4 eggs
5g active dry yeast
100ml full fat milk (room temperature)
1/2tsp of ground anise (optional)
for the topping
240g plain flour
125g icing sugar
125g butter
2tbsp cold water
2tsp cocoa powder (optional)
Method:
1. First make the dough. Put the flour in a large bowl, and make a well in the middle. Add the sugar, yeast and milk into the well, and flick some flour over the top of the liquid to cover it. Leave it until the mixture bubbles up through the flour, which takes between 10 mins and an hour depending on who you read.*
2. Add the eggs, butter, salt and anise (if using). The dough will resemble what is known as “a horrible mess”.
3. Knead boldly until the dough comes together and passes the windowpane test. The best kneading technique for this is Bertinet’s, which works brilliantly on very soft sweet doughs. At the start it will feel like you’re wrestling in oil, Greco-Roman style, but give it 15 mins.
4. Cover the dough and leave it until it doubles in side. Virtuous Bread says this will take 6 hours. (I’m not sure, because I left in the fridge overnight instead.)
5. To make the topping, cube the butter and rub it in to the sugar and the flour. Then add the water, and bring together into a pastry-like dough. Don’t over-handle the dough. Refrigerate until you need it.
6. When the dough is ready, divide and shape it into 9 balls. Place them on a sheet of parchment paper, and leave to rise until doubled, 1.5-2 hours.
7. When the dough is risen, pre-heat the oven to 220 degrees. Pull the topping out of the fridge, then divide and roll it in your hands into 9 balls.
8. Gently flatten the buns a little, so that they look like burger baps. Then roll out the topping balls with a rolling pin until they are the same size.
9. Brush the buns with milk, and pop the disk of topping on top. With a knife, cut 3 or 4 lines in the topping (or make cool shapes).
10. Bake for 15-20 mins.
*If I were to make this again, I’d try replacing steps 1 and 2 with the following: mix all the dough ingredients together except the flour, then add the flour gradually and knead. Would it make a difference? My money says no. And it’d be a lot simpler. [Update: see comment from Jane at Virtuous Bread below.]
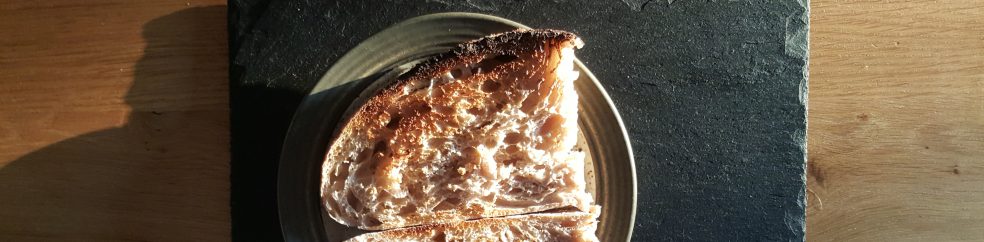
 These, like my last loaf, are from a recipe on Bread and Companatico. Barbara says the breads were first made for Viking explorers, who needed bread to last on the long weeks out at sea. Traditionally, crackers are baked with rye flour and hung from the ceiling through a hole in the middle. Apparently, a good cracker bread can last for up to a year.
 Not a super-traditional recipe, the one I made. There’s cumin in there, and lots of interesting seeds. It’s a far cry from the rye, salt, water that mixture the sixteenth-century Swedish peasant would have used. That’s the thing I’m discovering: the most authentic, most traditional version of a recipe is most often made out of nothing but the very simple staples of the poor. Sometimes it’s more fun to raid the spice rack.


